A Teacher’s Guide to Setting Up Zoom for Digital Learning
Zoom is a remote conferencing service that has swept the nation. It is simple, easy to set up, and easy to use. Best of all Zoom is offers free accounts for teachers, and this can make it a perfect solution for your digital classroom during remote learning or as a way to provide virtual tutoring.
Using Zoom in your distance learning classroom is easy, and it is a great way to stay connected and get some facetime with your students.
How to get started using Zoom for your digital classroom
Those who are new to Zoom might feel a bit overwhelmed by the prospect of hosting a digital class meeting, so I’ve compiled an easy guide to help teachers get started on the platform.
Signing Up with Zoom
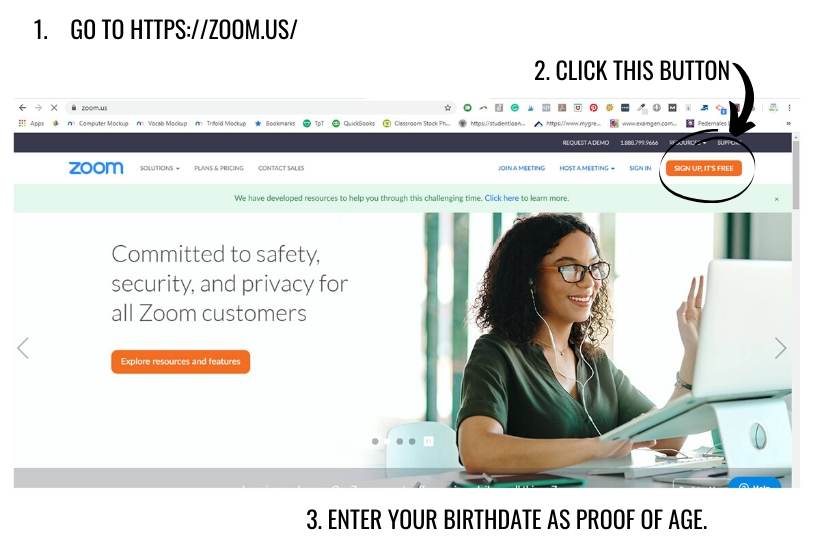
Before you can host your first digital class meeting, you’ll need to have a Zoom account. To create a free Zoom account, go to https://zoom.us/.
Select SIGN UP, IT’S FREE from the header bar. Confirm your date of birth before moving on.
Next, enter your sign-in information. If you are with a school that uses Zoom, you may have an SSO login. This is the most secure login, so it is definitely worth looking into whether your organization has signed up.
You can also sign in using Google or with Facebook, but beware that Zoombombers (the folks who drop in on meetings and share inappropriate materials) will find you in the most insecure places. Social media is the least secure with SSO being the most secure.
Nothing online is completely secure, I’ll share tips below to help make your digital classroom more secure.
Once you activate your account (verification will be sent to your email if you enter that separately) and fill out some information about yourself, you are ready to start!

Scheduling Zoom Meetings
The first thing you will receive is a personal meeting space URL. Think of this space as your own personal office.
You’re ready to have your meeting. Let’s look at your options (spaces).
If you are joining a meeting, select that. You will be asked for the meeting ID or personal link to join. This process is the same for people who want to join your meeting.
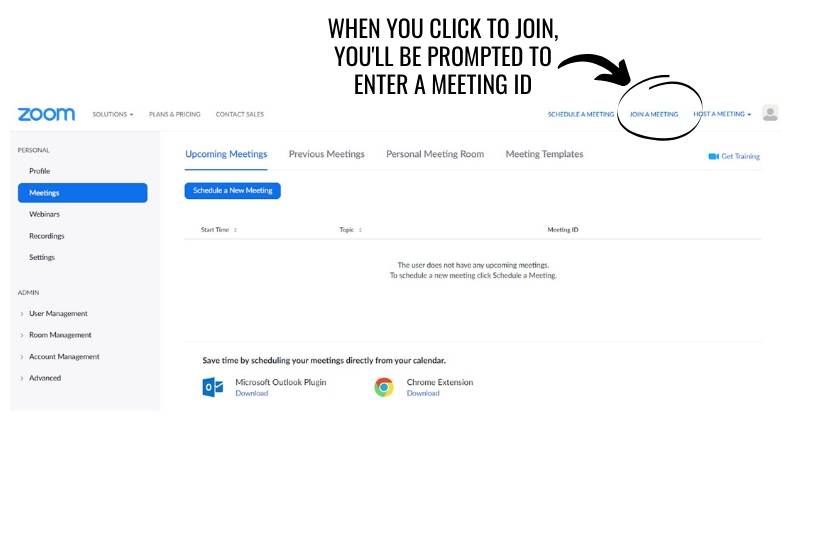
Personal Meetings
If you want to start a meeting right away, you can host a meeting. You can do this by clicking the “Host a Meeting” in the menu, as shown below.
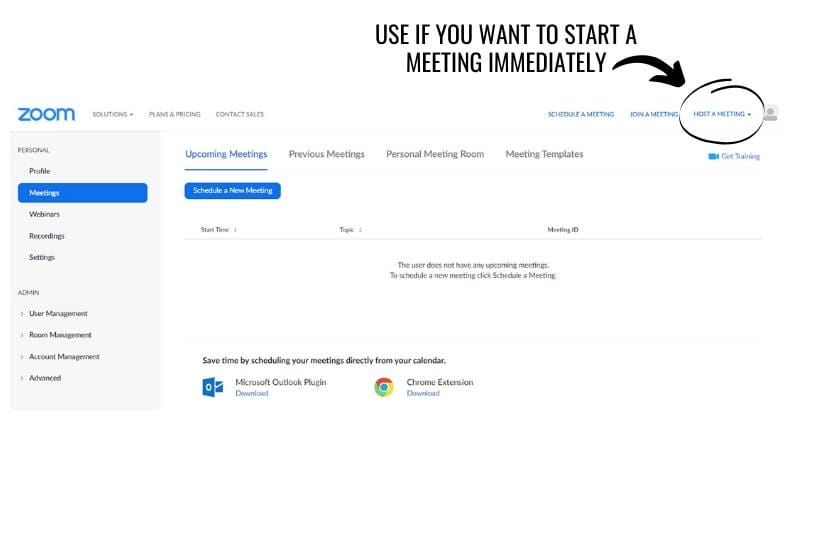
When you click, it will ask if you want video on, off, or screen share only. This feature works, but it’s not as smooth as scheduling a meeting or using your own personal meeting room.
Think of a personal meeting room like your office. It stays the same, so participants do not have to use a different meeting code over and over again and they can always find you when they need you.
Schedule New Meetings
Most people opt to Schedule a New Meeting. Here’s what it looks like in the platform.
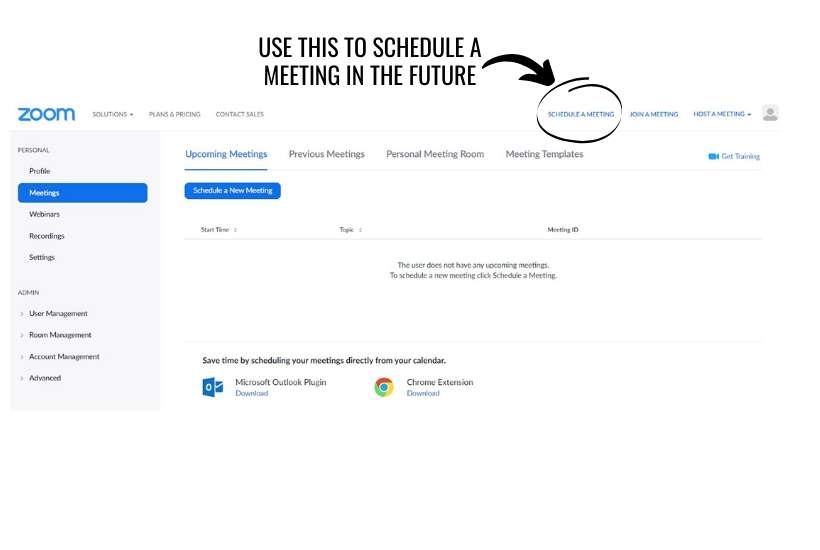
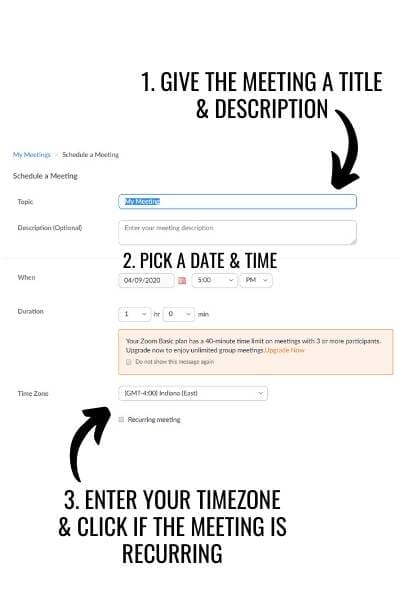
Select Schedule a New Meeting. You’ll see some options pop up. Here are the steps you’ll need to take:
- Give the meeting a title and description.
- Assign a date and start time for the meeting.
- Select your time zone & whether this is a recurring meeting.
Normally, Zoom has a 40-minute time limit for Basic (free) accounts, but Zoom has temporarily lifted that to help teachers better meet the needs of their students so you won’t have to worry if you need an hour or more to meet.
Meeting Settings
Your meeting ID, password, video, and audio settings can be adjusted here if necessary. If you change them here, you will see a disclaimer that states that feature will be changed in settings.
Once again, you have to adjust this meeting’s settings.
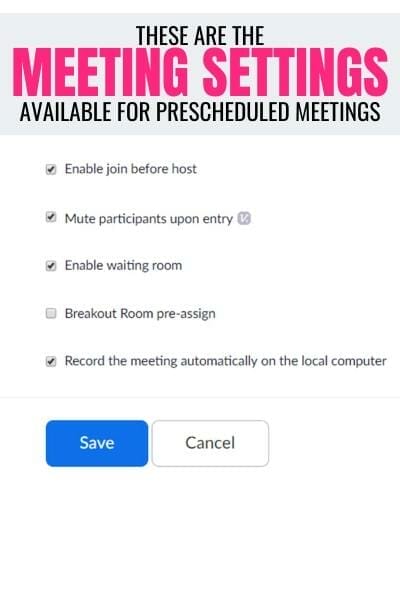
Starting Zoom Meetings
Once you are ready, you can start your meeting. I always enter the space before others. This gives me time to check my appearance as well as audio and video.
You will see a toolbar at the bottom of your screen.

Next to some of the icons, you see a chevron that allows for more information. If you press on the icon, it will change it, but if you press the chevron, you have options.
Audio and Video Settings
Audio and video settings are important when troubleshooting for issues that arise. Although you might not need them, it is good to be familiar with what is available.
These settings are to measure and test your audio features. When someone has no sound, it’s probably a feature here. You can always check the audio settings to see what’s wrong if the sound doesn’t work.
Next, you have video features. If you struggle with seeing a participant, this section is probably where the issues are.
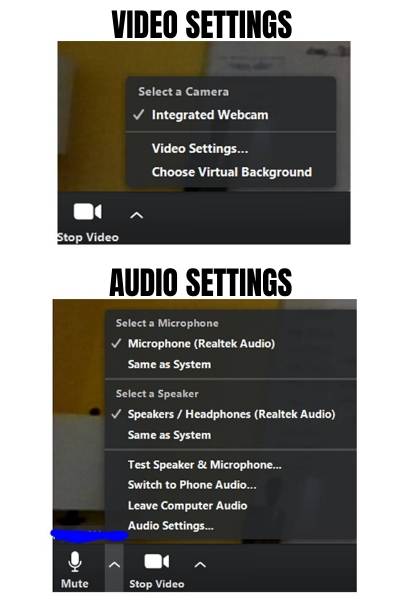
One fun way to engage students is to use the virtual background feature under your video settings. With this feature, you can superimpose any photo as your background while you’re in the meeting. This can also be a good tool for situations where your house might be a little chaotic and you don’t want students to see the mess.
Advanced Settings
If you select audio or video settings, you will see a lot more than video settings. Play around with your preferences. I prefer widescreen and HD. Without HD, everyone’s a little fuzzy on screen. Touching up your appearance looks enhanced.
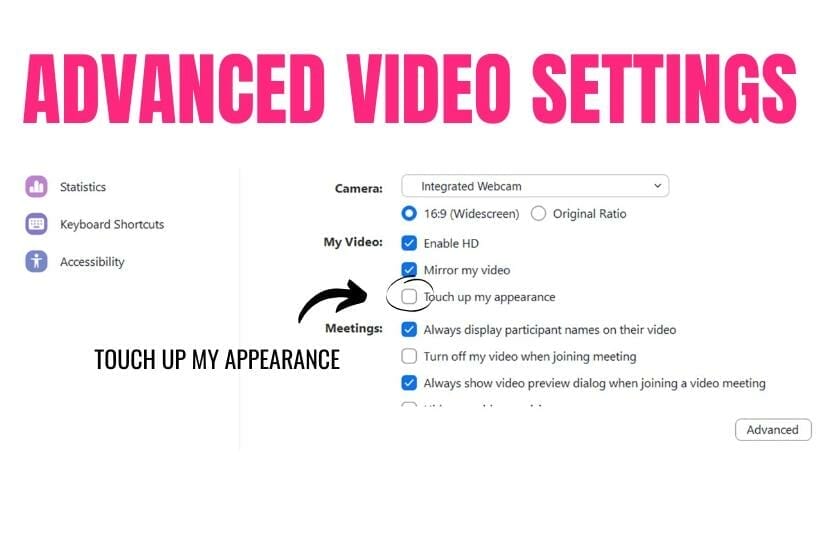
I also like to spotlight speakers, so I hear and see who is speaking, and I want to display participants per screen. It can be overwhelming, but I hate not seeing people.
Manage Participants
When you select manage participants and then chat, you will see a right-side menu. This menu has so many options. Here are just a few things you can do:
- see the list of participants
- mute participant audio – including mute all
- mute participant video – including mute all
- chat with individual participants
- get responses
One thing I love are the feedback features. As you can see in the image, you can get feedback from your participants real-time during the meeting including options like – yes, no, go slower, and go faster. For example, if a host is going too fast, a participant can click go slower, and the host will see that on the screen of their gallery view.
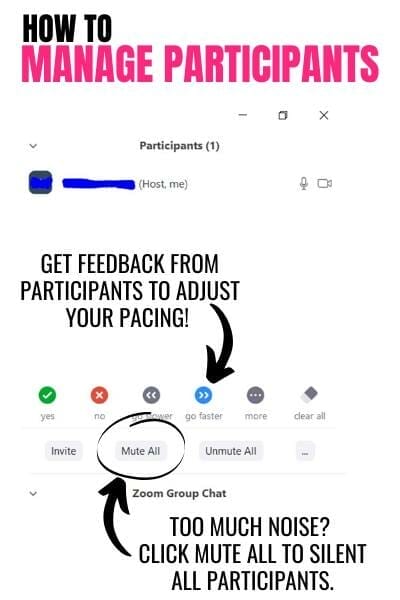
Below that, participants (and hosts) can chat with everyone or with individual participants. By selecting the chevron next to everyone, participants can select other individuals in the room. They can attach files and type messages to that individual or to everyone.
Make sure to set up clear rules for your students regarding chat and tools. You may choose to set up that your students can only chat with you to avoid distractions.
Next, you can also select record, closed-caption, and reactions, which all have a corresponding meaning. There are two more fun features in Zoom that you have to know about!
Screen Share
Screen Share is a feature you’ll definitely want to try. You’ll be able to share all of your distance learning materials with your students via Screen Share!

The chevron next to Share Screen takes you to the menu below, where you can select one of these options or click directly on Share Screen to see options.
Share your screen, a whiteboard, or any number of windows or files that you have open or want to open. You can show a presentation, document, photos, or more!
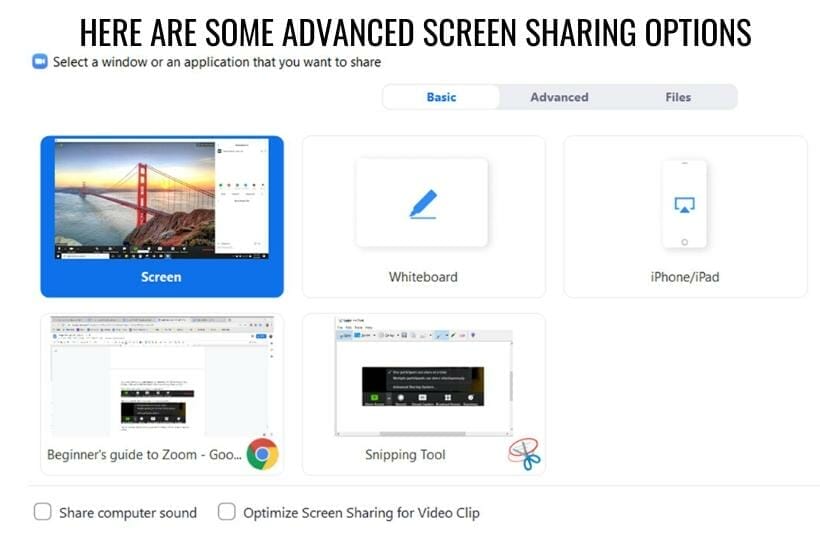
The whiteboard feature is amazing. Your Zoom whiteboard allows you to take notes, type notes, and annotate. You can collaborate on the whiteboard easily! Simply stop sharing when you’re ready to stop using the feature.

Breakout Rooms
Finally, the breakout room feature is another great tool to use to break participants into small groups. When you select breakout rooms, you will see some options. Adjust your settings, and a new Zoom window will start for those participants.
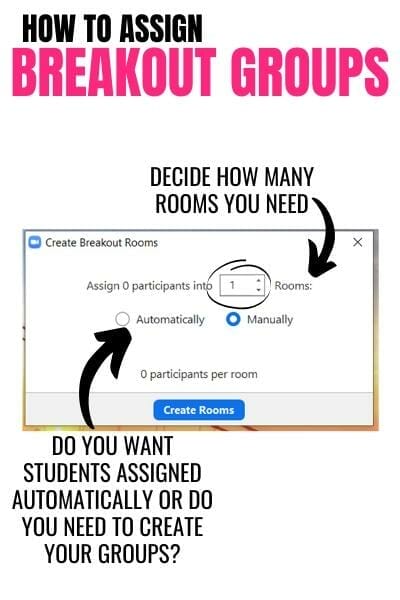
Breakout rooms are great if you have a co-teacher, para, or gifted educator to help differentiate instruction in small groups!
These can be a perfect tool for online literature circles or as part of digital novel studies. You can even play games with your class via Zoom!
There are so many features available within Zoom that will allow you to have a smooth meeting. If you prepare, stay vigilant, and practice, your Zoom experience will be great in your distance-learning classroom!


