The Ultimate Guide to Using Sensory Bottles to Reduce Meltdowns in the Classroom
Sensory bottles are a great way to help students slow down and relax when they are feeling overwhelmed or unable to manage their emotions. There’s something absolutely mesmerizing about watching a glitter calm down bottle settle, and this can often be enough to help students regain composure. From water beads to mini erasers, there are so many simple ways to create calm down jars, and they are perfect for your classroom cool down space.
From the most basic version to something spectacular, learn more about sensory bottles and get some great ideas for how to create your own sensory bottles using simple household products.

This article includes affiliate links. Purchases made through these links don’t cost you anything additional, but I earn a small commission which is used to help keep this site up and running.
What are sensory bottles?
Sensory bottles, also called calm down jars or bottles, are containers that have been filled with a variety of items and sealed to allow students to play and observe without making a mess.
These bottles are a great alternative to messier sensory experiences that students might crave as they try to re-regulate their emotions or seek sensory stimulation.
The bottles themselves come in all shapes and sizes, and you’ll find them filled with a nearly endless variety of materials. Regardless of what you fill them with, they are a great addition to the sensory or calming toolkit you should have in your classroom.

Why are sensory bottles good for kids?
Sensory bottles are great because they offer students a sensory experience in a safe, non-messy way. These bottles allow students who may crave sensory input to have hands-on exploration through their senses without disrupting their learning.

Sensory bottles can be created to meet any number of sensory needs including visual perception, auditory input, bodily awareness, and even vestibular input. This means you can customize the sensory experience you create to meet the exact needs of your students.
These bottles are also a great way to help calm kids who may be overstimulated or dislike touch. By shaking the bottle, the child can get proprioceptive input in a way that doesn’t harm themselves or others.
Watching the materials in the bottle slowly fall back to the bottom after vigorous shaking can also be a trigger to help calm breathing, thus helping the student re-regulate emotionally.
How to introduce and teach students how to use calm down bottles
Most students will not intrinsically know how best to use sensory bottles to help them calm down or appropriate gain the sensory input they need. This is why it is important to teach students how to use this tool, model its use, and offer guidance as a student begins to implement the strategies you’ve shared.
Step 1: Introduce the sensory bottle before issues arise.
To do this, you will want to introduce the bottle when the child is calm. If you’re using this as a part of a cool down spot in your classroom, you can do a whole group lesson on the bottle and how to use it. Model how to use the bottle – showing students how you use it to regulate your breathing and body.
Step 2: Use guided practice as the student begins to escalate.
From here, you can offer the bottle when you notice a student is beginning to escalate. You won’t want to wait until you’ve reached meltdown stage. Instead, catch the signs of escalation early so the child can use the strategy more effectively.
For example, you might say, “I see that you’re frustrated about that math problem. Let’s take a break and shake up this calming bottle. Just take some time to breathe while you watch the glitter fall, and when you’re ready, I can help you look at that problem again.”
In the example above, you named the emotion you noticed, verbally reviewed how to use the bottle appropriately, and offered support to help the student once they are calm.
Step 3: Provide access to the bottle and reteach/review expectations as needed.
Over time, you will likely need to provide less verbal direction to the student. However, in the early stages, you are still helping to reiterate the use of appropriate calming tools.
If you notice that your calm down bottles are being used inappropriately, do a quick re-teach to review the strategy and appropriate use.
Which bottles are the best for sensory bottles?
While you can use nearly any bottle you might have laying around, my personal favorite are those bottles that are similar to Voss water bottles. These bottles are great because of their size and lid. This makes your bottles look really nice instead of just some random soda bottle.
In case you don’t drink Voss water, Amazon offers a number of different sensory bottle options that are really decently priced. For example, at the time this article was written, you can get a 12- pack of 13.6 oz bottles shown below for under $17.

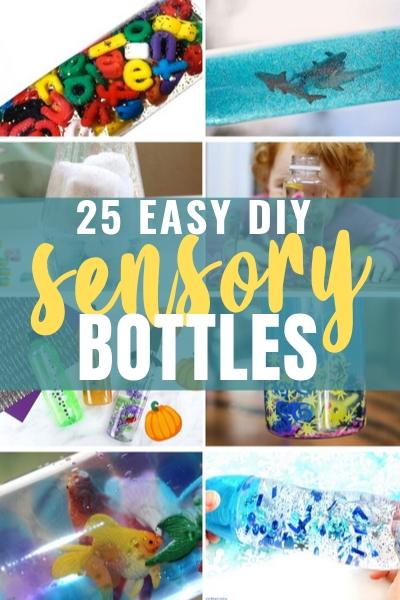
25 DIY Sensory Bottles for the Classroom
Whether you decide to create seasonal sensory bottles or keep the same option all year long, this list has a number of options that are perfect for a classroom cool down spot or in your sensory toolkit.

For most of these bottles, you’ll need very few items that are inexpensive and often can be found at your local dollar store.
- Winter Sensory Bottle
- Fall Leaves Sensory Bottle
- Halloween Sensory Bottles
- Firework Sensory Bottle
- Suspended Heart Sensory Bottle
- Cat in the Hat Sensory Bottle
- Monster Sensory Bottle
- At the Beach Sensory Bottle
- Galaxy Sensory Bottle
- Crayon Sensory Bottle
- Color Mixing Sensory Bottle
- Pokemon Sensory Bottle
- Alphabet Sensory Bottle
- Glow in the Dark Sensory Bottle
- Light Saber Sensory Bottles
- Rice Sensory Bottle
- Magnetic Field Sensory Bottle
- Earth Sensory Bottle
- Liquid Density Sensory Bottles
- Bug Sensory Bottle
- Rainstorm Sensory Bottle
- Shark Sensory Bottle
- Butterfly Sensory Bottle
- Glowing Stars Sensory Bottle
- Ocean Sensory Bottle


